About Shield Themes
Shield themes provide a way to add highway shield symbols to the project. First add a road map layer (with line geometry) to your map project. The road map layer must contain an attribute field that can be used by the shield theme to identify which segments of road to label with shields and how to draw the shields. Below is a list of valid attribute data that can be used by a shield theme.
Valid Attribute Data
Attribute data must contain one of the following formats to be used by the shield theme.
- Values beginning with "I-" will be displayed with a Interstate shield.
- Values beginning with "US-" will be displayed with a US Highway shield.
- Values beginning with "SR-" will be displayed with a state highway shield.
|
Steps For Adding A Shield Theme
- Right-click on the layer in the legend. A new menu will popup.
- Click on Layer Properties. The Layer Properties dialog will display.
- Click the Themes tab.
- Click the Shield button under the Themes section.
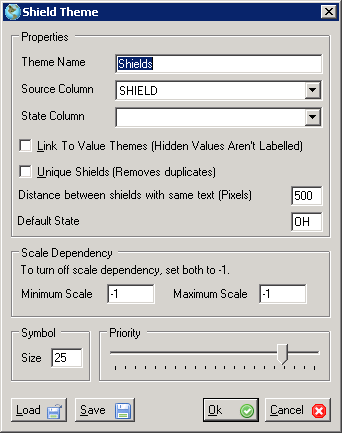
- The Shield Theme dialog will display. Type in a theme name. For example, 'Highway Shields'.
- Select the Source Column that will supply the attribute data to generate the shield.
- Optionally select the State Column that will inform AccuGlobe which set a state shields to use.
- Check Link To Value Themes to hide shields for features that have not be drawn. If a value theme or interval theme prevents a feature from being drawn, and this option is checked, the shield associated with this feature will not be drawn also.
- Check Unique Shields to eliminate any duplicate shields.
- Set the minimum distance that will seperate shields on the map. This value is in number of pixels, not map units.
- Set the default state. Use the two letter state abbreviation. This is only used if the State Column is unspecified.
- If map units have been set for the project it is possible to make the chart theme scale dependent.
- Change the size of the shields as desired.
- Set the shield priority. If labels or shields from different layers overlap the label or shield with the highest priority will be drawn.
- Click the OK button to add the theme.
- To make further changes to your shield theme, select it from the list and click the Edit button.
- To remove the chart theme select it from the list and click Remove.
- Click the Close button to exit the Layer Properties dialog. The map will redraw and apply your changes.
|
A screenshot of an example shield theme is shown below: